Composting for Beginners: A Simple Guide to Getting Started
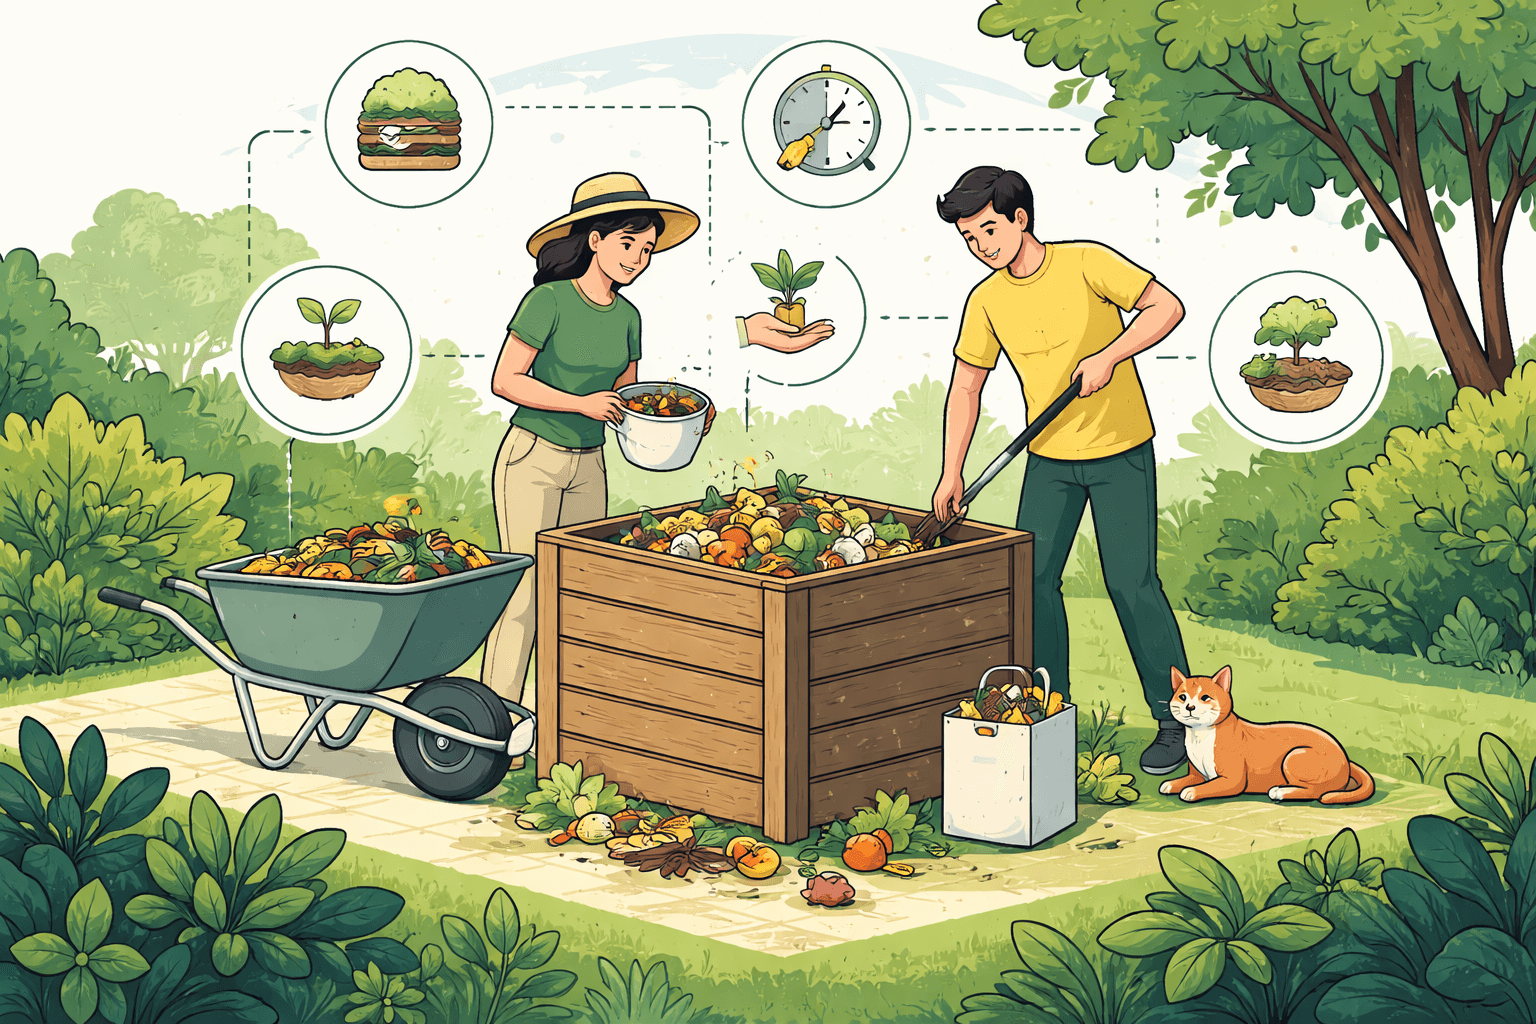
Composting for beginners is one of the easiest, most affordable ways to cut household waste and build healthier soil. The U.S. EPA estimates food is the single largest material in U.S. landfills by weight, making up about 24% of landfilled municipal solid waste; landfills are also the third-largest source of methane in the U.S., a greenhouse gas roughly 28–34 times more potent than CO₂ over 100 years (EPA; IPCC AR5). Turning kitchen scraps and yard trimmings into compost diverts organic material from landfills and returns carbon and nutrients to your soil—improving structure, water retention, and plant health.
This guide explains what composting is, the beginner-friendly ways to start, what to add (and avoid), how to keep a healthy system running, and how to use finished compost effectively.
What composting is and why it matters
Composting is the controlled decomposition of organic materials—like food scraps, leaves, and paper—by microorganisms in the presence of oxygen (aerobic). Microbes break down carbon-rich materials (often called “browns”) and nitrogen-rich materials (“greens”) into a stable, earthy, dark material called humus, or finished compost.
Let It Rot!: The Gardener's Guide to Composting (Third Edition) (Storey's Down-To-Earth Guides): Campbell, Stu
Let It Rot!: <strong>The Gardener's Guide to Composting</strong> (Third Edition) (Storey's Down-To-Earth Guides) [Campbell, Stu] on Amazon.com. *FREE* shipping on qualifying offers. Let It R
Check Price on AmazonWhy it matters now:
- Waste reduction: Households can divert hundreds of pounds of organic material per year. That reduces methane generation in landfills and cuts collection and disposal costs for cities (EPA; ReFED).
- Soil health: Compost increases soil organic matter, which improves nutrient holding capacity and soil structure. USDA NRCS notes that raising soil organic matter by just 1 percentage point can significantly improve water-holding capacity—commonly cited as up to tens of thousands of gallons per acre for the topsoil layer—helping plants through drought.
- Plant vigor and resilience: Compost provides a slow, steady trickle of nutrients (typically low N–P–K, around 1–1–1) and beneficial microbes, which can suppress some soil-borne diseases and reduce reliance on synthetic fertilizers (university extension literature).
For a broader look at how living soil underpins resilient landscapes, see our guide on Soil Health and Regenerative Agriculture: A Practical Guide to Restoring Living Soil.
Composting for beginners: choosing a method
There are several beginner-friendly ways to compost. Pick the one that fits your space, climate, and time.
Worm Factory® 360 Black US Made Composting System for Recycling Food Waste at Home – 4 Trays for Efficient Vermicomposting – Durable, Space-Efficient Design, Easy to Assemble, No Odor : Outdoor Composting Bins
View on AmazonBackyard pile or bin (cold or hot)
- Best for: Yards with space. Handles yard waste plus kitchen scraps.
- Setup: A 3x3x3 ft (about 1 cubic yard) volume helps retain heat and speed breakdown (Cornell Waste Management Institute). Use a simple bin (wire, wood, or plastic) to keep things tidy and deter pests.
- Pros: Low cost, scalable. Can process lots of material.
- Cons: Requires some turning and moisture management; may attract pests if mismanaged.
Tumbling composter
- Best for: Small yards, patios, and beginners who want faster results with fewer pests.
- Setup: Enclosed drum on a frame; turn by spinning. Two-chamber models let one side cure while you fill the other.
- Pros: Quick aeration, neater, more pest-resistant.
- Cons: Limited volume; can dry out quickly; need regular spinning.
Vermicomposting (worm bin)
- Best for: Apartments or indoors/garages. Uses red wigglers (Eisenia fetida) to convert food scraps into worm castings.
- Setup: A ventilated bin with moist bedding (shredded paper/cardboard + a handful of finished compost/soil). Add small amounts of chopped food regularly. Red wigglers eat roughly 25–50% of their body weight per day; starting with 1 lb of worms means ~0.25–0.5 lb of daily scraps.
- Pros: Odor-free when managed well; compact; produces high-quality castings.
- Cons: Sensitive to heat (>85°F), flooding, and acidic foods; avoid meat/dairy.
Bokashi (fermentation + later composting)
- Best for: Small spaces wanting to process all food types, including meat and dairy.
- Setup: Anaerobic fermentation in a sealed bucket with inoculated bran; after two weeks, bury fermented material in soil or add to a compost pile to finish aerobically.
- Pros: Fast pre-processing of scraps; reduces odors.
- Cons: Requires follow-up burial or active composting; initial purchase of inoculant.
If you want a step-by-step home setup overview to complement this beginner guide, see Composting at Home: A Practical Guide for Sustainable Living.
Apartment options without backyard space:
- Vermicompost indoors.
- Freeze scraps to prevent odors and drop them at a community garden or municipal organics site (if available).
- Join or start a building-wide collection—check local rules.
What to compost (and what to skip)
Think “greens” for nitrogen and moisture, “browns” for carbon and structure.
Greens (nitrogen-rich):
- Fruit and vegetable scraps, peels, coffee grounds and filters, tea leaves
- Fresh grass clippings and green plant trimmings
- Manure from herbivores (e.g., rabbits, horses; avoid dog/cat)
Browns (carbon-rich):
- Dry leaves, straw, shredded cardboard, paper (non-glossy), paper towels
- Wood chips, sawdust (from untreated wood), small twigs
- Dry plant stems, corn stalks
What beginners should avoid:
- Meat, fish, bones, dairy, oily foods (odor, pests)—unless using bokashi first
- “Compostable” plastics (most need industrial conditions)
- Diseased plants or plants treated with persistent herbicides
- Pet waste (dogs/cats), vacuum dust from synthetic carpets
- Glossy/colored paper, coal or charcoal ash, large branches
- Weeds with mature seeds or invasive species (unless hot composting reaches 130–160°F consistently)
Balancing greens and browns: easy ratios that work
Microbes need both carbon and nitrogen. The ideal carbon-to-nitrogen (C:N) ratio for fast composting is about 25–30:1 by weight (Cornell/extension sources). Because measuring by weight is cumbersome, use a simple volume rule of thumb:
- Aim for roughly 2–3 parts browns to 1 part greens by volume.
- Every time you add a pail of kitchen scraps (greens), cover with 2 pails of dry leaves or shredded cardboard (browns).
Tips:
- Chop or shred materials to increase surface area and speed breakdown.
- Add a thin layer of finished compost or garden soil occasionally as a microbial inoculant.
- If the pile looks wet and smelly, add more browns; if it’s dry and static, add more greens and water.
Maintaining a healthy compost pile: moisture, air, size, and turning
A healthy pile needs water, oxygen, the right size, and routine mixing.

Reotemp 20 Inch Fahrenheit Backyard Compost Thermometer with Digital Composting Guide : Outdoor Thermometers : Patio, Lawn & Garden
View on Amazon- Moisture: Keep it like a wrung-out sponge—about 50–60% moisture. If you squeeze a handful and a drop or two comes out, it’s about right. Too dry? Add water/greens. Too wet? Add browns and turn.
- Airflow: Aerobic microbes need oxygen. Turn the pile every 1–2 weeks, or spin a tumbler a few times every other day. Use coarse browns (sticks, straw) to create air pockets. Avoid thick mats of grass or leaves.
- Size and insulation: A minimum mass—about 3x3x3 ft—helps the pile heat up for “hot composting” (130–160°F), which speeds decomposition and can kill most weed seeds and many pathogens (Cornell). In cold climates, insulate with extra browns or a breathable cover.
- Temperature: A basic compost thermometer can help. Hot-active composting occurs around 130–160°F; turn the pile when temps fall back toward 110°F to re-oxygenate and reheat. Cold composting runs cooler and slower but requires less effort.
- Time: Hot systems can produce finished compost in 2–3 months; cold systems may take 6–12 months. Tumblers are often faster; vermicomposting can yield castings in 2–4 months depending on feeding rates and temperature.
Troubleshooting common problems
Strong ammonia smell (sharp, like cat urine)
- Cause: Too much nitrogen/greens or insufficient browns.
- Fix: Mix in dry browns (leaves, shredded cardboard), turn to aerate.
Rotten/putrid odor; slimy textures
- Cause: Anaerobic conditions (too wet, compacted).
- Fix: Fluff/turn thoroughly, add coarse browns, stop watering until balanced.
Pests (rodents, raccoons)
- Cause: Exposed food scraps; meat/dairy; open access.
- Fix: Avoid meat/dairy/oils; bury fresh scraps 6–8 inches deep; cover every addition with browns; use rodent-resistant bins and hardware cloth under floor.
Fruit flies
- Cause: Exposed wet food material.
- Fix: Add a dry “cap” layer of browns after each addition; avoid large dumps of very wet scraps; seal countertop caddies.
Ants
- Cause: Pile too dry.
- Fix: Water lightly and turn to disrupt colonies; maintain sponge-like moisture.
Slow or no decomposition
- Cause: Too dry, too cold, too many browns, or pieces too large.
- Fix: Add greens or dilute nitrogen sources (e.g., fresh grass), add water, chop materials smaller, increase pile size, or turn more frequently.
Worm bin odors or escapes (vermicomposting)
- Cause: Overfeeding, excess moisture, acidic foods (citrus), or heat.
- Fix: Feed less; add dry bedding; keep below ~80–85°F; bury food; provide drainage and airflow.
How to tell when compost is ready
Finished compost has these signs:
- Color and texture: Dark brown to black, crumbly, soil-like; original materials are mostly unrecognizable.
- Smell: Earthy and pleasant; no sour or ammonia odors.
- Temperature: Returned to ambient for at least a week after last turning.
- Stability: A small sealed jar test (fill a jar two-thirds with moist compost, cap loosely for 3 days) should not develop strong odors—an informal stability check.
If in doubt, let compost “cure” for 2–4 weeks in a separate bin or pile without new additions. This reduces the risk of “burning” sensitive plants or seedlings from residual ammonia or organic acids.
How to use finished compost effectively
- Garden beds (soil amendment): Spread 1–2 inches of compost and work it into the top 6 inches of soil before planting. Most home gardens benefit from 0.5–1 cubic yard of compost per 100 square feet annually, depending on soil condition.
- Mulching around perennials and shrubs: Apply a 1–2 inch layer on the surface, keeping it a few inches away from stems to avoid rot. Mulching suppresses weeds and reduces evaporation.
- Lawn topdressing: Screen compost (remove large bits) and apply about 0.25 inch after aeration, then water in. This improves soil structure and resilience.
- Potting mixes: Blend 10–30% compost with inert components (coconut coir or peat alternatives, perlite/pumice). Avoid using 100% compost in pots; it can be too dense and variable for container roots.
- Houseplants: Add a thin layer to the surface or mix 10–20% into repotting mix. Water thoroughly and monitor for fungus gnats; cover with a bit of coarse sand if needed.
Storage: Keep finished compost covered and slightly moist in the shade to preserve microbial life and prevent nutrient loss. Avoid letting it bake bone dry or sit in standing water.
For practical, water-wise planting ideas that pair well with compost-amended beds, see Practical Sustainable Gardening: Greener, Resilient Practices for Every Garden.
By the numbers
- 24%: Share of landfilled municipal waste that is food in the U.S. (EPA). Composting diverts a major methane source.
- 130–160°F: Target “hot composting” temperature range that speeds decomposition and reduces many pathogens and weed seeds (Cornell/extension guidance).
- ~2–3:1: Simple volume ratio of browns to greens that approximates the ideal 25–30:1 carbon-to-nitrogen ratio for fast, odor-free composting.
- 50–60%: Moisture target for active compost; think “wrung-out sponge.”
- ~3x3x3 ft: Minimum active pile size that retains heat for hot composting in most climates (Cornell).
- ~50%: Typical volume reduction of raw material as it becomes compost, saving bin space and hauling costs (extension sources).
Practical setup tips for fast success
- Pre-stage browns: Keep a bin or bag of shredded leaves or cardboard next to your compost system year-round. Always cover new scraps.
- Right-size scraps: Chop fruit rinds, corn cobs, and stems. Shred cardboard. Smaller pieces compost faster and more evenly.
- Weather-smart watering: In rainy seasons, use a breathable cover (tarp or burlap) to prevent waterlogging. In dry/hot periods, water lightly after turning.
- Layer, then mix: Start with a coarse brown base for air flow, add alternating greens/browns, then mix to integrate. Finish each session with a dry brown “cap.”
- Keep a log: Note additions, turning dates, and moisture observations. It helps you learn your system’s rhythm.
What this means for households and communities
- Households: Expect cleaner trash (less odor), fewer liners used, and healthier plants. Many families report fewer trips to the curb as organics make up a large share of weight and volume in the trash stream.
- Gardeners: Compost is a foundational input for soil structure and moisture resilience, especially as heat waves and droughts become more frequent. NRCS and university trials consistently show better infiltration and reduced erosion with added organic matter.
- Communities: As more cities roll out curbside organics, well-sorted residential streams produce cleaner compost and reduce contamination. Households already practicing source separation adapt faster and with fewer service issues. For ideas to shrink your overall waste footprint alongside composting, see Zero Waste Lifestyle: A Practical Guide to Reducing Household Waste.
What’s next: scaling composting and improving quality
Policy momentum is growing. Several U.S. states and dozens of municipalities now require or incentivize organics diversion for households and businesses. As programs scale, two things matter most for quality compost:
- Contamination control: Keeping plastics and glass out at the source is far cheaper than sorting later. Clear guidance on “what goes where,” plus simple at-home systems, are key.
- Local end markets: Using compost for urban trees, stormwater green infrastructure, and regenerative agriculture closes the loop. Agencies and DOTs increasingly specify compost for erosion control and soil restoration because it delivers measurable performance benefits (improved infiltration, reduced runoff, better plant establishment).
Whether you have a backyard or just a countertop caddy and a worm bin, starting now compounds benefits over time: less methane from landfills, healthier soils, and more resilient gardens.
Recommended Products
Let It Rot!: The Gardener's Guide to Composting (Third Edition) (Storey's Down-To-Earth Guides): Campbell, Stu
Let It Rot!: <strong>The Gardener's Guide to Composting</strong> (Third Edition) (Storey's Down-To-Earth Guides) [Campbell, Stu] on Amazon.com. *FREE* shipping on qualifying offers. Let It R
Worm Factory® 360 Black US Made Composting System for Recycling Food Waste at Home – 4 Trays for Efficient Vermicomposting – Durable, Space-Efficient Design, Easy to Assemble, No Odor : Outdoor Composting Bins
The Worm Factory 360 Black US Made Composting System is <strong>a durable, space-efficient solution for vermicomposting at home</strong>. Available in 4 or 6 tray options, it offers customizable compo
Reotemp 20 Inch Fahrenheit Backyard Compost Thermometer with Digital Composting Guide : Outdoor Thermometers : Patio, Lawn & Garden
Reotemp - <strong>Accurate and durable thermometers since 1965</strong> · Quality Construction - 20 inch length, 1/4" diameter stem, stainless steel construction, hermetically sealed to prevent f
More in Sustainability Policy
- Composting at Home: A Practical Guide for Sustainable Living
- How to Recycle at Home: Practical Steps, What Belongs Where, and Easy Systems to Reduce Waste
- How to Recycle Effectively: Practical Guidance to Reduce Waste and Avoid Contamination
- How to Set Up a Local Recycling Initiative: Practical Steps to Start, Run, and Sustain Community Recycling